
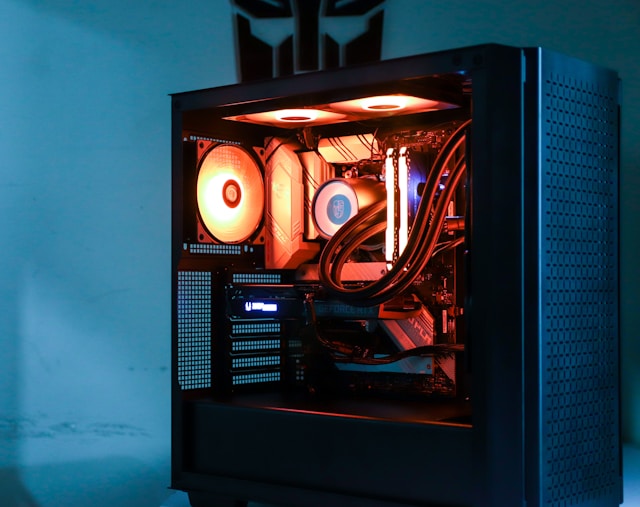
Building a gaming PC is one of the most satisfying tech projects you can do because you end up with a machine you truly understand. You will know exactly what each component does, how it is installed, how airflow moves through your case, and how to trouble
Our go-to shop for gaming PC parts and custom-built PCs is Rebel Gaming. Not only do they offer some of the best prices on computer components, but their service is also second to none.
A gaming PC is a system. The parts must match each other in physical fit, electrical support, and performance balance. Before buying, decide what you are building for.
Start by choosing the target you actually want to play at, because that determines the GPU, and the GPU influences everything else. If you want 1080p at 144 Hz, you need a different GPU level than 1440p at 165 Hz or 4K at 120 Hz. Higher resolution loads the GPU harder. Higher refresh rates can also load the CPU harder in competitive games.
Next decide the type of PC you want. If you want a quiet PC, you will prioritize a good airflow case, better fans, and a cooler that can run at lower fan speeds. If you want a compact PC, you will need to be stricter about part size and cable routing. If you want heavy upgrade flexibility, you will prioritize a stronger PSU, a motherboard with more M.2 slots, and a case with space for larger GPUs.
Always confirm with the motherboard manual and the case specifications, especially for RAM speed support, cooler clearance, GPU length, and front panel connector types.
A complete gaming PC build normally includes these core parts. The CPU is the processor. It handles game logic, physics, background tasks, and helps drive high frame rates in CPU sensitive games. The motherboard is the platform that connects everything, provides power delivery, expansion slots, storage slots, and all the headers for fans and front panel ports. The GPU is the graphics card and is usually the single most important part for gaming performance at higher resolutions and higher graphics settings.
RAM is memory your system uses for active tasks. Enough capacity prevents stutters from running out of memory, and correct configuration improves performance and stability. Storage is where Windows and games live. SSDs load games much faster than HDDs. The PSU is the power supply. It powers every component, and quality matters more than most people think. The case houses the build, controls airflow, dust filtering, and determines cable management options.
Cooling includes the CPU cooler and the case fans. You also need a Phillips screwdriver with a magnetic tip, a clean workspace with good lighting, a small container for screws, and isopropyl alcohol and a microfiber cloth if you need to redo thermal paste.
Choose the CPU first. Pick AMD or Intel based on your budget and the performance you need. For gaming, pay attention to single core performance and how the chip behaves under gaming loads, not only core count. The CPU choice determines the socket, and the socket determines which motherboard families fit.
Choose your GPU based on your gaming target. The GPU drives most gaming performance. Confirm the physical size, power requirements, and display outputs before purchasing. Do not assume more VRAM always means faster. VRAM capacity helps at higher resolutions and with high texture settings, but overall performance depends on the GPU architecture and horsepower.
Choose a case that fits the GPU and supports airflow. Check the case GPU clearance in millimeters and compare it to the GPU length listed by the manufacturer. Check cooler clearance and look for airflow focused front panels with mesh and decent dust filters.
Choose the motherboard that matches the CPU, case size, and features you need. Motherboards come in sizes like ATX, micro ATX, and mini ITX. Check VRM quality, M.2 slots, USB header types, and whether WiFi and Bluetooth are included. Always confirm BIOS support for your CPU on the manufacturer's website.
RAM has three things most people need to understand: capacity, speed, and configuration. For modern gaming, 16 GB can still work, but 32 GB is often the more comfortable choice if you multitask, stream, or play newer titles. Most consumer platforms are dual channel. If you are using two RAM sticks on a typical four slot motherboard, the recommended slots are usually A2 and B2. Always check the motherboard manual to confirm. Enable XMP for Intel oriented kits or EXPO for AMD oriented kits in BIOS to run RAM at its rated speed.
For storage, NVMe SSDs using PCIe lanes slot directly into the motherboard and are significantly faster than SATA SSDs. PCIe 4.0 NVMe is a strong balance of price and performance for most builds. A practical approach is to use one NVMe SSD for Windows and games, and optionally add a second SSD or HDD for bulk storage.
For cooling, air coolers are reliable, simple, and can be extremely quiet if sized well. AIO coolers are self contained liquid coolers that perform well for hot CPUs. Always check radiator size support in your case and consider mounting orientation so trapped air stays away from the pump.
The PSU is not the place to cut corners. Start by estimating system power draw and then add headroom. If your system might draw 500 W under load, a quality 750 W unit provides comfortable headroom, quieter fan operation, and upgrade flexibility.
Choose a fully modular PSU when possible, as all cables are detachable, which makes cable management easier. Confirm you have the right connectors for your GPU, motherboard 24 pin main power, and CPU EPS power.
Unbox everything carefully and keep manuals accessible, especially the motherboard and case manuals. Before building, confirm the motherboard matches the CPU socket, the case supports the motherboard form factor, the GPU length fits the case, the PSU fits the case and has the connectors you need, and the cooler fits and is compatible with your CPU socket.
This is the cleanest way to build because you have space, visibility, and less risk of awkward pressure inside the case. Place the motherboard on its box or on a non conductive surface.
To install the CPU, open the socket mechanism and hold the CPU by the edges. Align the CPU using the small triangle marker on one corner and match it to the triangle on the socket. Place it gently without force, then close the retention mechanism.
Insert the M.2 NVMe SSD at a slight angle into the slot, push it flat, and secure it with the screw or latch. If the slot has a thermal pad under the heatsink, remove the plastic film before reinstalling the heatsink. This is a very common mistake.
Install RAM in the correct slots, usually A2 and B2 for two sticks on a four slot board. Line up the notch with the key in the slot and press down firmly and evenly until the latches click. It takes more pressure than most first timers expect.
Apply a small pea sized dot of thermal paste to the CPU if the cooler does not have pre applied paste. Mount the cooler straight down and tighten screws gradually in an alternating pattern to ensure even pressure. Connect the CPU cooler fan cable to the CPU_FAN header.
Remove both side panels and lay the case on its side. Confirm the motherboard standoffs are installed in the correct pattern for your motherboard size. A misplaced standoff can short the board. Install the I/O shield if your motherboard has a separate one.
Decide your airflow plan before mounting everything. A common setup is front intake and rear and top exhaust. Front fans pull cool air in and rear and top fans push warm air out.
Lower the motherboard into the case carefully, aligning the rear ports with the I/O opening and aligning screw holes with the standoffs. Install the screws snug but not excessively tight.
Connect front panel headers for the power button, reset button, power LED, and HDD LED. The motherboard manual shows the exact pin layout. LEDs are polarity sensitive, so orientation matters. This is the number one reason a PC will not turn on for first time builders.
Connect the front USB 3 header carefully as it can be stiff. Connect front USB C if your case and motherboard both support it, and connect front panel audio to the AAFP or HD_AUDIO header.
Mount the PSU in the case, usually at the bottom. If the PSU fan faces down toward a dust filter with clearance underneath, that is the preferred orientation for most modern cases.
Route cables through the case grommets so they emerge close to their connection points. The main cables you normally need are the 24 pin motherboard power cable, the CPU EPS power cable, GPU PCIe power cables, and SATA power cables for any additional drives or accessories.
If you have a 2.5 inch SATA SSD or 3.5 inch HDD, mount it in the appropriate tray and connect a SATA data cable from the drive to the motherboard and SATA power from the PSU.
Connect case fans to the motherboard fan headers. If you have more fans than headers, use a fan hub. Route fan cables along edges and tie them behind the motherboard tray, leaving a clean main chamber.
Locate the top PCIe x16 slot, remove the required rear slot covers, open the PCIe slot latch, and insert the GPU straight down until it clicks. Secure it to the case with screws and connect power cables. Use separate PCIe power cables for higher power GPUs rather than daisy chained connectors. If the GPU sags, use a support bracket.
Good cable management improves airflow, reduces dust buildup, makes the system easier to service, and reduces the chance of cables touching fans. Route the 24 pin cable, CPU EPS cable, GPU power, and other cables through the nearest appropriate grommets with runs straight and parallel to edges.
Behind the motherboard tray, bundle cables into groups: motherboard power, PCIe GPU cables, SATA power and data, and front panel and fan cables. Use Velcro straps first, then zip ties once you are happy. Do not over tighten. Leave a little service slack at connection points so you can remove a component without cutting all your ties.
Before pressing the power button, confirm the 24 pin motherboard power cable is fully seated, the CPU EPS cable is fully seated, the CPU cooler fan is connected to CPU_FAN, the GPU is fully seated and has power connected, RAM is fully seated in the correct slots, the front panel power switch is connected to the correct pins, and the monitor cable is plugged into the GPU, not the motherboard.
If the system powers on and restarts once or twice, do not panic. Memory training can cause multiple restarts on some platforms, especially DDR5. If you get no display, check the motherboard diagnostic LEDs for CPU, DRAM, VGA, or BOOT indicators.
Once you see the BIOS screen, the PC is alive. Enable XMP for Intel oriented kits or EXPO for AMD oriented kits so your RAM runs at its rated speed. Check CPU temperatures at idle. If they are unusually high, it can indicate a cooler mounting issue or pump not running on an AIO.
Set fan curves sensibly. Keep fans lower at idle for quiet operation and ramp up smoothly under load. Avoid aggressive curves that constantly change during normal use. If everything is stable, many builders do not update BIOS unless there is a specific reason such as improved CPU support or memory stability fixes. Ensure your USB installer is first in the boot order for the initial Windows installation.
Install Windows from a USB installer and choose the NVMe SSD as the main drive. Once Windows is installed, install chipset drivers first from AMD or Intel, then GPU drivers directly from AMD or Nvidia, then motherboard LAN and WiFi drivers if needed.
Use a trusted temperature and system monitor to check CPU and GPU temps at idle and under load. Use CrystalDiskInfo to check SSD health and CrystalDiskMark to measure performance. Run a GPU benchmark to verify temperatures and clocks look normal. Run a CPU load test briefly to ensure it does not overheat. Run a memory stability test if you enabled XMP or EXPO.
Set your display refresh rate in Windows to match your monitor, as Windows sometimes defaults to 60 Hz even on high refresh monitors. If you have a dedicated game drive, set your game library paths in Steam and other launchers early. Enable file extensions in Windows Explorer so you can see real file types.
If a PC does not turn on, the most common cause is the CPU EPS power cable not plugged in at the top of the motherboard, or the front panel power switch connector on the wrong pins. If it turns on but shows no display, the most common cause is the monitor plugged into the motherboard instead of the GPU, or the GPU or RAM not fully seated.
If temperatures are very high, the most common cause is poor cooler mounting pressure, forgetting to remove plastic film from a cooler contact plate or M.2 thermal pad, or fans oriented incorrectly. If performance is lower than expected, the most common cause is XMP or EXPO not enabled, the monitor refresh rate not set correctly, or drivers not installed properly.
A great gaming PC build is not just powerful, it is stable, cool, quiet, and easy to maintain. If you follow the build order above, read the manuals for slot and header specifics, route cables with purpose, and verify BIOS and driver setup, you will end up with a machine that feels professional the moment you press power.
The information provided in this article is for general educational and informational purposes only. Building and configuring a computer involves working with sensitive electronic components and carries inherent risks. The author and publisher are not responsible for any damage to hardware, data loss, or system failure. Always follow manufacturer instructions for each individual component. For professional PC building, upgrades, or troubleshooting, consider consulting experienced technicians such as Rebel Gaming or another trusted computer specialist.